Powered By Blogger

Tuesday 31 March 2015

fantastic foamy fountain

  • A clean 16 ounce plastic soda bottle
  • 1/2 cup 20-volume hydrogen peroxide liquid (20-volume is a 6% solution, ask an adult to get this from a beauty supply store or hair salon)
  • 1 Tablespoon (one packet) of dry yeast
  • 3 Tablespoons of warm water
  • Liquid dish washing soap
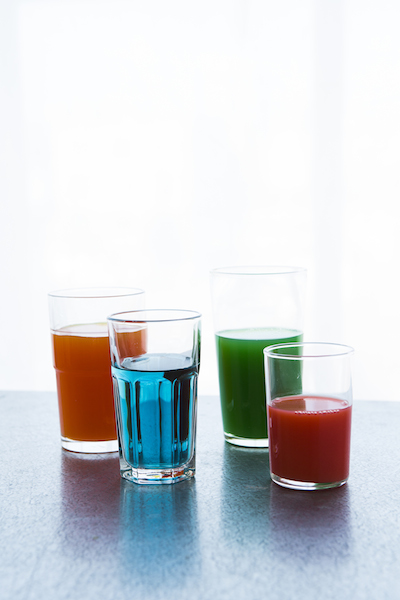
  • Food coloring
  • Small cup
  • Safety goggles

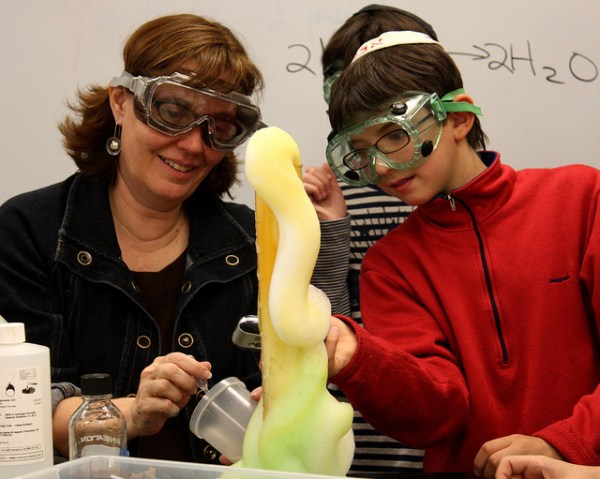
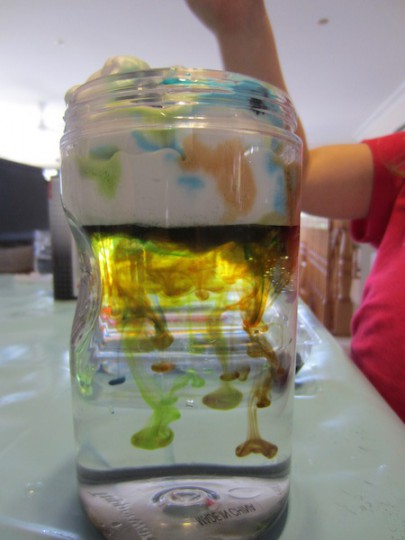
NOTE: As you can see from the picture, foam will overflow from the bottle, so be sure to do this experiment on a washable surface, or place the bottle on a tray.
1. Hydrogen peroxide can irritate skin and eyes, so put on those safety goggles and ask an adult to carefully pour the hydrogen peroxide into the bottle.

2. Add 8 drops of your favorite food coloring into the bottle.

3. Add about 1 tablespoon of liquid dish soap into the bottle and swish the bottle around a bit to mix it.

4. In a separate small cup, combine the warm water and the yeast together and mix for about 30 seconds.
5. Now the adventure starts! Pour the yeast water mixture into the bottle (a funnel helps here) and watch the foaminess begin!

Foam is awesome! The foam you made is special because each tiny foam bubble is filled with oxygen. The yeast acted as a catalyst (a helper) to remove the oxygen from the hydrogen peroxide. Since it did this very fast, it created lots and lots of bubbles. Did you notice the bottle got warm. Your experiment created a reaction called an Exothermic Reaction - that means it not only created foam, it created heat! The foam produced is just water, soap, and oxygen so you can clean it up with a sponge and pour any extra liquid left in the bottle down the drain.
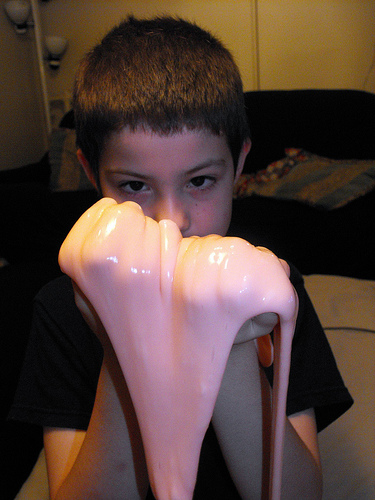
This experiment is sometimes called "Elephant's Toothpaste" because it looks like toothpaste coming out of a tube, but don't get the foam in your mouth!

The project above is a DEMONSTRATION. To make it a true experiment, you can try to answer these questions:
1. Does the amount of yeast change the amount of foam produced?
2. Does the experiment work as well if you add the dry yeast without mixing it with water?
3. Does the size of the bottle affect the amount of foam produced?

Rapid Color Changing Chemistry!

Sometimes it’s hard to tell SCIENCE from MAGIC - and this little demonstration is a great example of that. In this experiment you will watch an almost clear liquid suddenly turn dark blue in a flash. It takes a bit of preparation, and probably a trip to the pharmacy for materials, but we think it’s worth it.

IMPORTANT SAFETY INFORMATION: This experiment should only be done with the help of an adult. Iodine will stain just about anything it touches and it can be hazardous. Hydrogen peroxide can cause eye and skin irritation - safety goggles are needed throughout the experiment. Be sure your helpful adult reads the caution labels on each container.


  • 3 clear plastic cups 4 ounces or larger
  • A 1000 mg Vitamin C tablet from the pharmacy (you can also use two 500mg)
  • Tincture of iodine (2%) also from the pharmacy
  • Hydrogen peroxide (3%) yep, also from the pharmacy
  • Liquid laundry starch (see below for alternatives)
  • Safety goggles
  • Measuring spoons
  • Measuring cup
  • An adult helper

  1. Put on those safety goggles and mash the 1000 mg Vitamin C tablet by placing it into a plastic bag and crushing it with a rolling pin or the back of a large spoon. Get it into as much of a fine powder as possible. Then put all the powder in the first cup and add 2 ounces (60 ml) of warm water. Stir for at least 30 seconds. (The water may be a little cloudy) Let’s call this “LIQUID A”
  2. Now put 1 teaspoon (5 ml) of your LIQUID A into a new cup and add to it: 2 oz (60 ml) of warm water and 1 teaspoon (5 ml) of the iodine. Notice the brown iodine turned clear! Let’s call this “LIQUID B.” By the way, you’re done with LIQUID A - you can put it aside.
  3. In the last cup, mix 2 oz of warm water, 1 Tablespoon (15 ml) of the hydrogen peroxide and 1/2 teaspoon (2.5 ml) of the liquid starch. This is, you guessed it, “LIQUID C”
  4. Okay, that was a lot of preparation, on to the fun part. Gather the friends and family and pour all of LIQUID B into LIQUID C. Then pour them back and fourth between the 2 cups a few times. Place the cup down and observe….be patient....somewhere between a few seconds and a few minutes, the liquid will suddenly turn dark blue!

This is an example of the chemical reaction know as the IODINECLOCK REACTION. It is called a clock reaction because you can change the amount if time it takes for the liquids to turn blue. (see experiments below) The chemistry of the demonstration gets a bit complicated, but basically it is a battle of chemistry between the starch which is trying to turn the iodine blue, and the Vitamin C which is keeping it from turning blue. Eventually the Vitamin C loses and, bam! - you get instant blueness.

Note: If you do not have liquid starch, you can also use 1/2 teaspoon of corn starch or potato starch. The liquids will be more cloudy and the reaction will happen a bit more slowly, but it’s still impressive.
Clean up: Carefully pour all liquids down the drain with plenty of water and wash your hands. Recycle the cups or dispose of them in the trash.

The project above is a DEMONSTRATION. To make it a true experiment, you can try to answer these questions:


1. Does the temperature of the water affect how quickly the liquids turn blue?
2. Does the amount of Vitamin C added (Liquid A) affect how fast the liquid turns blue?
3. Does stirring the liquids more affect how fast the liquids turn blue?

BUILD YOUR OWN PERSONAL FOG TORNADO

Fog Torndao!
  • A copier paper box
  • A small 12 volt computer fan from a computer or electronics store. It should be at least 3x3 inches (8cm X 8cm).
  • A piece of clear plastic 10 X 17 inches (25cm X43cm) If your really in a hurry, you can test your fog tornado with clear plastic food wrap.
  • A small plastic food container
  • Dry ice (or other source of fog - see below)
  • Black paint
  • 9-volt battery (if your fan doesn't plug in)
  • Optional (but cool) battery-powered tap light
  • Adult help
Parts of the cardboard will need to be cut out using an exact-o blade.This part is definitely for an adult - kids hurt themselves every year trying to cut foam core and cardboard - don't let that be you - know when to ask for help.
  1. Follow the diagrams below, cutting away the areas marked in gray. IMPORTANT: Pay special attention to the placement of the slots. In order for the tornado to work, the slots will need to be in the correct place.
    • The opening at the top should be just a bit smaller than your fan.
    • The opening at the bottom should be bigger than the plastic food container.

  2. Paint the inside of the box with flat black poster paint and allow it to dry.
  3. Tape (or hot glue) the clear piece of plastic into the large window on the front. Be sure to keep the nearby slot open so air can flow through it.
  4. Attach the tap-light to the inside of the top of the tornado box near the fan opening.
  5. That’s it! Your Tornado Chamber is ready.
A note about the fog. I have found 3 decent sources of fog:
  • DRY ICE - Dry ice makes the best looking tornado, in my opinion, which is why I give the directions for it here. Dry ice should only be handled by adults. It can cause instant frostbite. Never handle dry ice without thick gloves and always wear safety goggles. Only someone familiar with dry ice and its dangers should handle it.
  • HUMIDIFIER - Many small humidifiers create a continuous source of mist that works well for the tornado chamber. You will need to find a way to mount the tornado chamber above your humidifier.
  • FOUNTAIN MISTERS - A fountain mister uses ultrasonic vibrations to create a light mist. They can often be found in stores that sell small fountains and in some pet shops.
FOG TORNADO TIME!
  1. Turn on the battery powered light if you have one, and power up the fan. (red wire goes on the skinnier lead of the 9 volt battery) and place it on the top of the chamber with the breeze blowing up.
  2. Place some small chunks of dry ice into your food container and add some warm water to create fog.
  3. Put your tornado chamber over the container and watch the wonders of vortex currents at work!

As the fan forces air out of the chamber, air from outside the box is forced in through the slots on the sides. The position of the slots causes the incoming air to create a VORTEX (spiral) of air as it is drawn up and out of the box. Real tornados form in a similar way using updrafts and wind-shear (wind from different directions at different altitudes)

The project above is a DEMONSTRATION. To make it a true experiment, you can try to answer these questions:
1. Can you control the shape of the tornado by covering up parts of the slots?
2. Does a faster or more powerful fan change the shape of the vortex?
3. Do bigger boxes make bigger tornados?

BUILD A TABLETOP HOVERCRAFT!


  • An old CD or DVD disc
  • A 9” balloon
  • A pop-top cap from a liquid soap bottle or a water bottle
  • A hot glue gu
  1. If you are using the cap from a water bottle, cover the center hole of the CD with a piece of tape and poke about 6 holes in the tape with a push-pin or small nail. This will slow down the flow of air and allow your hovercraft to hover longer.
  2. Use the hot glue gun to glue the cap to the center of the CD or DVD disc. Create a good seal to keep air from escaping.
  3. Blow up the balloon all the way and pinch the neck of it. (Don’t tie it.)
  4. Make sure the pop-top is closed and fit the neck of the balloon over the pop-up portion of the cap. (This is usually easier with 2 people)
  5. That’s it! When your ready to commence hovering, simply put the craft on a smooth surface and pop the top open.
HAPPY HOVERING!

The air flow created by the balloon causes a cushion of moving air between the disc and the surface. This lifts the CD and reduces the friction which allows the disc to hover freely. Large scale hovercraft are capable of traveling over land, snow and water.

The project above is a DEMONSTRATION. To make it a true experiment, you can try to answer these questions:
1. Does the size of the balloon affect the CDs ability to hover?
2. Does a helium balloon work better than an air filled balloon?
3. Do larger discs make better hovercrafts (plastic picnic plates, old record albums) ?

The Magic Ketchup Experiment!

You can make a pack of ketchup float and sink
at your command while it's sealed inside a bottle!

        * A 1 liter plastic bottle
        * Ketchup pack from a fast food restaurant
        * Salt (using Kosher salt helps keep the water from becoming foggy)
    
  1. Remove any labels from the bottle and fill it all the way to the top with water.
  2. Add a ketchup pack to the bottle.
  3. If the ketchup floats, you're all set - go to step 4. If the ketchup sinks in the bottle, go to step 5.
  4. For the floating ketchup pack simply screw the cap on the bottle and squeeze the sides of the bottle hard. If the ketchup sinks when you squeeze it, and floats when you release it, congratulations, you're ready to show it off. If it does not sink when you squeeze it, try a different kind of ketchup pack or try a mustard or soy sauce pack.
  5. If the ketchup pack sinks, add about 3 tablespoons (45 ml) of salt to the bottle. Cap it and shake it up until the salt dissolves. (Kosher salt will keep the water from getting too cloudy, although it will usually clear up over time if using regular table salt.)
  6. Continue adding salt, a few tablespoons at a time until the ketchup is just barely floating to the top of the bottle.
  7. Once it is consistently floating, make sure the bottle is filled to the top with water, and then cap it tightly.
  8. Now squeeze the bottle. The magic ketchup should sink when you squeeze the bottle and float up when you release it. With some practice you can get it to stop in the middle of the bottle.

This experiment is all about buoyancy and density. Buoyancy describes whether objects float or sink. This usually describes how things float in liquids, but it can also describe how things float or sink in and various gasses.
Density deals with the amount of mass an object has. Adding salt to the water adjusted the water's density to get the ketchup to float. Sound complicated? It is, but here's the basics on the ketchup demo...there is a little bubble inside of the ketchup packet. As we know bubbles float, and the bubble in the ketchup sometimes keeps the heavy packet from sinking. When you squeeze the bottle hard enough, you put pressure on the packet. That causes the bubble to get smaller and the entire packet to become MORE DENSE than the water around it and the packet sinks. When you release the pressure, the bubble expands, making the packet less dense (and more buoyant) and, alas, it floats back up. This demonstration is sometimes known as a CARTESIAN DIVER.

The project above is a DEMONSTRATION. To make it a true experiment, you can try to answer these questions:
1. Do different food packs (ketchup, mustard, soy sauce) have the same density?
2. Does the temperature of the water affect the density of the ketchup packet?
3. Does the size of the bottle affect how much you have to squeeze to get the packet to sink?

Monday 30 March 2015

make a simple duck call

  • One plastic straw from your kitchen or local fast food restaurant
  • Scissors
  • Lungs (don't worry you already have them)

    1. Use your fingers to press on one end of the straw to flatten it - the flatter the better.
    2. Cut the flattened end of the straw into a point (see below).

    3. Flatten it out again real good.
    4. Now take a deep breath, put the pointed end of the straw in your mouth and blow hard into the straw. If all goes well you should hear a somewhat silly sound coming from the straw. The smaller you are, the harder it may be to get a good sound - sometimes adults can get more of a sound thanks to their bigger lungs. If you still have trouble, try flattening it out some more or cutting the straw in half.

    5. Don't stop there - try cutting the straw different sizes to see how the sound changes, or make another identical straw and add the pointed end of the new straw to the uncut end of the first straw (to make the first straw longer) The sound will be very different, (more like a moose call!) and you will have to blow even harder, but give it a try.


This is science? It sure is. You see all sounds come from vibrations. That little triangle that you cut in the straw forced the two pieces of the point to VIBRATE very fast against each other when you blew through the straw. Those vibrations from your breath going through the straw created that strange duck-like sound that you heard. Now you will never be bored again when you go to a fast food restaurant! Have fun!

The project above is a DEMONSTRATION. To make it a true experiment, you can try to answer these questions:
1. Which size straw call sound the most like a duck?
2. Which length of straw is the easiest to get a sound? Which is the hardest?
3. Does the diameter of the straw affect the sound it produces?

bend a bone with a vinegar

  • A jar large enough to fit a chicken bone
  • A chicken bone - a leg or "drumstick" bone works best
  • Vinegar
    1. Have a nice chicken dinner and save a bone. Leg bones work best.
    2. Rinse off the bone in running water to remove any meat from the bone.
    3. Notice how hard the bone is - gently try bending it. Like our bones, chicken bones have a mineral called calcium in them to make them hard.

    4.
    Put the bone into the jar and cover the bone with vinegar. It might be a good idea to put the lid on the jar or cover it - let it sit for 3 days

    5. After 3 days remove the bone. It should feel different. Now can rinse it off and try bending it again. Is it really a rubber bone?

So what happened? What is so special about vinegar that it can make a hard bone squishy? Vinegar is considered a mild acid, but it is strong enough to dissolve away the calcium in the bone. Once the calcium is dissolved, there is nothing to keep the bone hard - all that is left is the soft bone tissue. Now you know why your mom is always trying to get you to drink milk - the calcium in milk goes to our bones to make our bones stronger. With some effort and you can really get the bone to bend.

The project above is a DEMONSTRATION. To make it a true experiment, you can try to answer these questions:
1. Does the length of time the bone is in vinegar affect how much the bone bends?
2. Do smaller size bones become "bendy" sooner?
3. Do different types of vinegar affect how bendy bones become ?

Film Canister Rocket

It’s time to turn your home into a laboratory. Learn about static energy and re-create homemade lightning. See a rocket ship launch with the science of chemical reactions. Here are 17 experiments to get those brain gears churning — click through to see them all. We’ve even ranked the messiness factor from one to five sponges so you know what to expect.
Film Canister Rocket

Film Canister Rocket 

A Lesson In: Chemistry and air pressure. Like the popular baking soda and vinegar experiments, this film canister rocket literally takes it to the next level by using that creation of gas and energy to jet off into the sky. If your explorer has seen videos of mountain tops getting blown off during a volcanic eruption, this science project is pretty much any space lover’s version

Invisible Licorice

This summer keep your kids learning and engaged with fun hands-on projects that pack in big time fun without the need for a lot of supplies or clean-up afterwards. In fact, if you have glasses and food coloring at home you’re well on your way to scientific fun. Click through the gallery to peek at our favorite science experiments that require five supplies or less.
Invisible Licorice

Invisible Licorice

Did the candy melt or disappear? Your sweetums might think it’s magic, but it’s really all about perspective and science.
You’ll Need:Licorice, or other long, straight candy (alternative: a pencil or straw)
Tall, skinny drinking glass
Cooking oil, such as vegetable or olive oil
How To:1. Pour some oil into the glass.
2. Put the candy stick into the glass. At the surface of the oil, does the candy look as if it has been cut in half?
3. Lean the candy stick against the side of the glass. (If the licorice doesn’t lay flat against the side, make a bend near the bottom of the stick to help hold it in place.)
4. Look at the side of the glass, and slowly turn it. Does the licorice get wider and narrower? Can you make it disappear?
What’s happening:You’ve probably noticed how light bends in a glass of water. This is what makes things inside a glass of water look so distorted and strange. Oil bends light even more than water does. In fact, it can bend the light so much that, if you hold the glass the right way, a piece of candy nestled against the side of the glass is completely hidden from your eyes.

Learn Plant Science Through Colored Leaves

This summer keep your kids learning and engaged with fun hands-on projects that pack in big time fun without the need for a lot of supplies or clean-up afterwards. In fact, if you have glasses and food coloring at home you’re well on your way to scientific fun. Click through the gallery to peek at our favorite science experiments that require five supplies or less.
Learn Plant Science Through Colored Leaves

Learn Plant Science Through Colored Leaves

You’ve watered plants before, right? You know how it works: You plant something, give it some water, give it some light, give it some time and voila! Beans! Or broccoli! Or flowers! But . . . how does it work? How does the water go from the dirt into the plant and on up into the flower? This experiment,  will teach your kids all about plant science in a fun and simple way.
You’ll Need:
Three white flowers. We used Gerbera daisies, but you can use anything you have on hand or that is easily available at the florist or store: roses, carnations. Go pick some lawn daisies if you have them. If you don’t have flowers, celery works great as well.
Four glasses of water
Food dye: blue, yellow, green, red
Sharp knife
How to:
1. Let your little lab partner mix each color into each of your glasses, until you have four glasses of different colored water. The stronger you make the colors, the better.
ColoredLeaves-Process-1
2. Add two flowers to two colors of your partner’s choice and set aside. You should have two colors and one flower remaining at this point. 
ColoredLeaves-Process-2
3. Take your last flower and have your lab partner slit the stem so that you’ll be able to put one part of the stem.
ColoredLeaves-Process-3
Now take the two remaining colored glasses and part the stem, placing each half of the stem into different colored glasses. In other words, your flower should now be drinking from two glasses at the same time. Got it? Good.
Note: Let your lab partners do this if you feel they’re up to it. Even the cutting. Teach tool safety and step aside if they’re comfortable with it.
4. Place the water glasses away from the sunlight and watch what happens. You’ll start to notice some fascinating results within an hour or so, as the colored water creeps up the stem and begins to color the leaves. But wait a few days and keep observing the petals for fuller color displays.
Did You Know?Xylem is the name for one type of plant tissue that carries water. It comes from the Greek word xylon, meaning “wood.” The other tissue is called phloem. It comes from the Greek word phloios meaning “bark.” Together, these tissues form the main capillary action that helps plants drink water and nutrients and survive.

Dancing Oobleck

It’s time to turn your home into a laboratory. Learn about static energy and re-create homemade lightning. See a rocket ship launch with the science of chemical reactions. Here are 17 experiments to get those brain gears churning — click through to see them all. We’ve even ranked the messiness factor from one to five sponges so you know what to expect.
Dancing Oobleck

Dancing Oobleck

It’s A Lesson In: Sound waves. The word “oobleck” comes from a Dr. Seuss story where a young boy must rescue his kingdom from a sticky substance. But the neat part of this experiment is how oobleck reacts to vibrations. Put the oobleck over a subwoofer (on top a cookie sheet!) and watch it dance to difference frequencies. Your dancer will see how sound isn’t just about volume!

Make Water Float

This summer keep your kids learning and engaged with fun hands-on projects that pack in big time fun without the need for a lot of supplies or clean-up afterwards. In fact, if you have glasses and food coloring at home you’re well on your way to scientific fun. Click through the gallery to peek at our favorite science experiments that require five supplies or less.
Make Water Float

Make Water Float

Can you make water float? We bet you can. No, you don’t need to be a wizard or a witch. You don’t need to cast a spell. There’s nothing magic about it at all, in fact. You can make water float using good, ol’ fashioned, awesome science. The “trick” to this experiment is air pressure.
You’ll Need:
A small glass of water
A sink or bathtub over which to do this experiment. Or just go outside. Or do it over the kitchen floor if you’re really daring (and willing to clean). Up to you.
An index card or piece of construction paper large enough to cover the opening of the glass
How to: 
1. Fill the glass with as much water as you’d like. No need to be precise. Now have your lab partner turn the glass upside down, or maybe over her head on a hot day. That’s right. Go for it. See what happens. The water pours out, right?
2. Now let your junior mad scientist fill the glass again. No need to measure, although for this part, the more you add, the more difficult the experiment becomes. Maybe start half full and go from there.
3. Now that you have a half-filled glass of water, have your lab partner put a card or paper on top of it and press down firmly, while rotating the cup until it’s upside down. Now, have your lab partner remove her hand, leaving the piece of paper in place. Did it work? Did the water remain in the glass? If this doesn’t work for you right away, try a larger piece of paper, or less water and watch as the water stays in place.

Elephant Toothpaste

It’s time to turn your home into a laboratory. Learn about static energy and re-create homemade lightning. See a rocket ship launch with the science of chemical reactions. Here are 17 experiments to get those brain gears churning — click through to see them all. We’ve even ranked the messiness factor from one to five sponges so you know what to expect.
Elephant Toothpaste

Elephant Toothpaste

It’s A Lesson In: Chemistry. The magic of this experiment is in the yeast, which breaks hydrogen peroxide down into water and a lot of oxygen. All that air then gets trapped by the soap water and then explodes forth in the form of a foamy volcano. Ask your scientist to touch the bottle; it will be warm because energy is being released. You’ll want to set down a cookie sheet or mat to catch the mess.

The Juice-Tasting Challenge

This summer keep your kids learning and engaged with fun hands-on projects that pack in big time fun without the need for a lot of supplies or clean-up afterwards. In fact, if you have glasses and food coloring at home you’re well on your way to scientific fun. Click through the gallery to peek at our favorite science experiments that require five supplies or less.
The Juice-Tasting Challenge

The Juice-Tasting Challenge

Tummy’s rumbling–it’s time to eat! Did you know that you “eat” with your nose and eyes as well as your mouth? It’s true. Put your family’s snifffers and peepers to the test with this juice-guessing game.
You’ll Need:
Masking tape
4 glasses
Pen and paper
4 flavors of juice
4 food colorings
How to:
1. Stack a piece of tape on the bottom of each glass and number them one to four, making sure your partner can’t see the numbers. Pour one type of juice into each glass.
2. Send your partner out of the room. Drip a different food coloring into each juice and stir so your partner can’t recognize the juice by its color alone. Record the number, juice type, and color in each glass on a piece of paper.
3. Call your partner back. Tell her to hold her nose, sip from each glass, and guess the juice If she’s like most people, she’ll be kind of confused–her eyes and tongue give her two conflicting flavor messages.
4. Ask her to unplug her nose, close her eyes, and sniff the juice before drinking it. Her guesses should be on target now. All hail the mighty schnoz

Clouds Jars

It’s time to turn your home into a laboratory. Learn about static energy and re-create homemade lightning. See a rocket ship launch with the science of chemical reactions. Here are 17 experiments to get those brain gears churning — click through to see them all. We’ve even ranked the messiness factor from one to five sponges so you know what to expect.
Clouds Jars

Clouds Jars

It’s A Lesson In: How Clouds Hold Water. Let your imagineers pretend shaving cream is a cloud that holds colorful rain drops. As they squeeze more and more food coloring, their “cloud” will soon release the excess below — just like how real clouds get too heavy and let the rain loose on a gloomy day. 

Homemade Slime

It’s time to turn your home into a laboratory. Learn about static energy and re-create homemade lightning. See a rocket ship launch with the science of chemical reactions. Here are 17 experiments to get those brain gears churning — click through to see them all. We’ve even ranked the messiness factor from one to five sponges so you know what to expect.
Homemade Slime

Homemade Slime

A Lesson In: Polymers. Is it a liquid or solid? The answer is both! This DIY slime — made from glue, borax and water — is also known as a polymer (molecules that can stick close together to be a solid or spread apart and take liquid form). And it’s all thanks to borax, which acts as a binder to prevent the glue from going completely liquid.  Prolong the life of your goo by keeping it in an airtight container in the fridge.

Why Does Salt Melt Ice?

Have you ever lived in or visited a snowy place in the winter? Have you ever wondered why salt is spread over the roads after it snows or why people sprinkle salt over their stairs and walkway when they get icy? Wonder no more because we are going to answer those very questions right now. We are going to bring winter science inside of our kitchen to do an experiment the kids will love.
Why Does Salt Melt Ice? The Science Kiddo
When salt is mixed with ice it lowers the freezing point. Usually water freezes at 32° F (0° C), but when it is mixed with salt it lowers the freezing point significantly. This simply means the ice melts. We have used this same trick to make yummy treats like fruity ice slush and easy homemade ice cream!

For our experiment today we will use this phenomenon to do a little trick I like to call "Fishing for Ice".

Total Time: Less than 5 minutes
Safety Concerns: None. All ingredients are safe and edible, though perhaps not very tasty when mixed together!

Materials You Need:
Cup full of water
A few ice cubes
Table salt
A piece of string
Why Does Salt Melt Ice? The Science Kiddo
Directions:
  • Place the ice cubes in the cup of water. They will float on top.
  • Try to "fish" for an ice cube with the string. It won't "catch" anything.
  • Place the string in the water and across the top of the ice cubes. 
  • Now sprinkle a little bit of salt across the ice cubes. Wait for a minute or so.
  • Pull the string out and see what you caught!
Print These Instructions
Why Does Salt Melt Ice? The Science Kiddo
When salt is sprinkled over ice it melts. However, when it is used in such a small amount, like in our experiment, the water around the ice freezes again quickly. This means that the string gets trapped as the water around it refreezes, thus making it stick to the ice. We were able to freeze all of our ice cubes to one piece of string. How about you?